Hi there! If you’re about to use a cash register for the first time, don’t worry—I’ve got your back. Whether you’re a new cashier starting your first shift or a small business owner training your team, this guide is here to make it simple. I’ll walk you through eight easy steps so you can handle sales like a pro.
At POS USA, we’re all about helping beginners feel confident and showing you how tools like POS systems can lighten the load. Let’s get started and turn that register into your best friend!
Table of Contents
- 1 Step 1: Learn What a Cash Register Is All About
- 2 Step 2: Set Up Your Cash Register
- 3 Step 3: Prepare Your Cash Drawer
- 4 Step 4: Ring Up Your First Sale
- 5 Step 5: Handle Mistakes or Returns
- 6 Step 6: Close Out at the End of Your Shift
- 7 Step 7: Fix Problems That Come Up
- 8 Step 8: Explore Extra Features
- 9 Tips to Feel Confident as a New Cashier
- 10 Be a Friendly Cashier
- 11 Why Learning This Matters
- 12 Wrap It Up
- 13 FAQs
- 13.1 What’s the difference between a cash register and a POS?
- 13.2 What if my drawer’s off at the end?
- 13.3 Can I use a tablet as a register?
- 13.4 What if the register stops mid-sale?
- 13.5 How long does it take to learn a cash register?
- 13.6 How do I count change back to a customer?
- 13.7 What do I do if I enter the wrong amount?
- 13.8 Can a cash register track my sales?
- 13.9 How do I train someone else on a cash register?
- 14 Got a question about registers? Share it below!
Step 1: Learn What a Cash Register Is All About
Why It Matters
A cash register is the machine that keeps your sales on track. It adds up what customers buy, takes their money, and figures out change. Imagine you’re buying a $6 sandwich. You hand over $10, and the cashier gives you $4 back. That’s the register doing its job—keeping everything straight.
Different Kinds You Might Use
You’ll see a few types out there:
- Basic Registers: These have buttons you press to enter prices—great for small spots like a food stand.
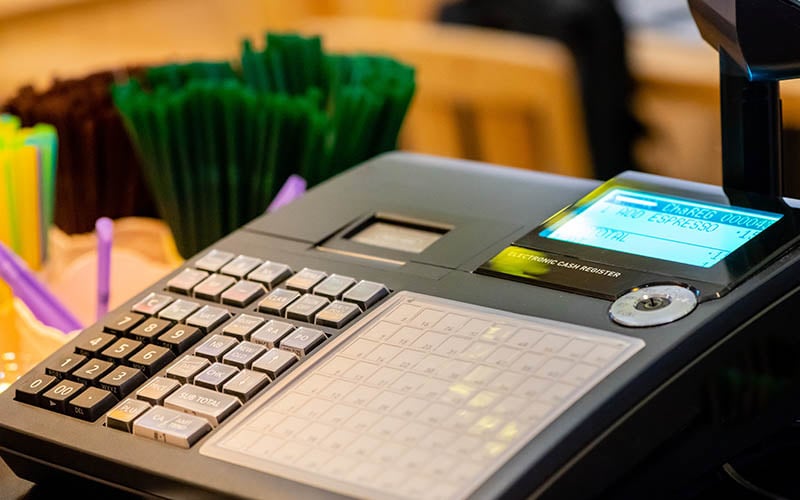
- Electronic Registers: These come with screens and sometimes scanners. Perfect for busy little shops or cafés. Check our list of the best cash registers for small businesses.
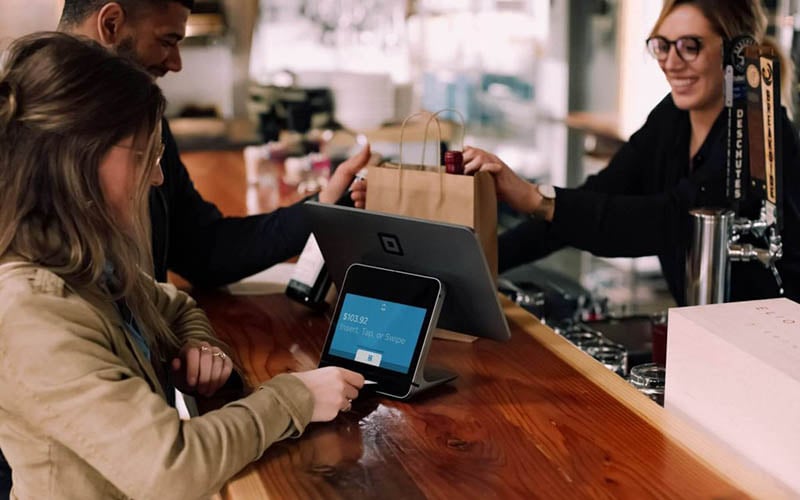
- POS Systems: These are “point-of-sale” setups that handle sales and extras like inventory. Curious about them? Take a peek at our best POS systems for small businesses.
- Mobile Registers: These run on tablets or phones—super handy for food trucks or extra lines during a rush.
- Cloud Registers: These connect online and link multiple locations—ideal if you’re running more than one store.
Not sure which one’s right for you? Learn how to choose the right cash register for your business to find the perfect fit.
Getting Comfortable
Take a second to check out your register. Does it have a scanner? A touchscreen? Just buttons? When I started, my first register was a basic one with a loud beep every time I pressed a key. It took me a few tries to stop jumping, but I got the hang of it fast. You will too, just give it a quick look before you dive in.
Quick Tip
If there’s a manual lying around, flip through it. Even a couple of pages can clue you in on the basics.
Step 2: Set Up Your Cash Register
Why Setup Counts
Getting your register ready is like setting up your desk before work. Do it well, and everything flows better all day.
How to Do It
Here’s what you need to do:
- Pick a Good Spot: Put it where customers can see it and reach it—no crowded corners or wobbly tables.
- Plug It In: Connect it to a wall outlet. Keep the cord out of the way so it’s not a tripping hazard.
- Add Batteries: Find where the batteries go—check the manual if you’re unsure. They’ll keep it running if the power goes out. Plan to replace them once a year.
- Set the Date and Time: Enter today’s date, time, and your local currency. Add tax rates if your area has them. If you miss this, receipts might show weird numbers—like charging $5 instead of $5.50 with tax.
- Add Your Items: If it’s an electronic register or POS cash register, type in what you sell—like “Soda” for $2. Basic ones don’t need this, but keep a price list close by.
- Test It: Try a practice sale. Enter a $5 item, pay with $10, and see if it gives $5 back. Drawer opens? Receipt prints? You’re set.
Real-Life Example
A bakery owner set up a new register with help. Spending 20 minutes on setup and testing led to a smooth first shift with no hiccups. The satisfaction was clear. Taking time on this step can bring that same success for new users.
Step 3: Prepare Your Cash Drawer
Why It’s a Must
Your cash drawer is where all the money lives during your shift. If it’s not set up right, you’ll run out of coins or bills fast.
Steps to Get Ready
Here’s how:
- Start with Some Cash: Put in about $50—mix ones, fives, and coins so you’re ready for change.
- Check the Money: Make sure bills look good—not torn—and coins aren’t grimy. Clean cash feels more professional.
- Count It Up: Add it all up twice to be sure you’ve got the right amount.
Tip for Newbies
Feeling jittery about counting? Use a calculator to keep it accurate. New cashiers might miss $2 when rushing—sometimes needing a coworker’s help—but counting slowly prevents those slip-ups.
Step 4: Ring Up Your First Sale
Why It’s the Fun Part
This is where you get to shine—ringing up sales is the heart of working a register, and it’s easier than you think.
How to Do It
Follow these steps:
- Sign In: Use your code, swipe a card, or turn a key—whatever starts your register.
- Enter the Sale: If there’s a scanner, swipe the item’s barcode. No scanner? Type the price—like $6 for a burger—then add extras like $1 for fries. Hit subtotal to see the total.
- Take Payment: For cash, type in what they give you—like $10. For cards, swipe or tap and wait for “approved” to pop up.
- Give Change: If they pay $10 on a $7 sale, count back $3: “8, 9, 10.” It keeps you on track.
- Print the Receipt: Press the print button, tear it off, and hand it over. Some registers offer email receipts too.
Practice Makes Perfect
Run a few practice sales before the real ones begin. A new cashier might ring up $100 and slip on a $2 change at first—shaky moments happen—but it gets easier fast. Confidence builds with every try.
Step 5: Handle Mistakes or Returns
Why It Happens
Sometimes you’ll hit the wrong button, or a customer wants a refund. It’s no big deal—we’ve all been there.
What to Do
Here’s the fix:
- Find the Sale: If they have a receipt, use it to pull up what they bought. No receipt? Look by time or item—it takes a little longer but works.
- Fix It: Press the refund or void button, then give back their cash or card payment. A POS will update stock automatically; for basic ones, jot it down to fix later.
- Keep It Friendly: If they’re upset, say, “Sorry about that, I’ll sort it out.” It calms things down quick.
Lesson From a Common Slip
A cashier might charge $10 instead of $5 by mistake. If a customer spots it, fixing it in 30 seconds can turn it around—they might even smile leaving. Small errors like these sharpen skills quickly.
Step 6: Close Out at the End of Your Shift
Why It’s Important
Closing out means making sure your sales match the cash in the drawer—like checking your wallet after a day out.
How to Wrap Up
Here’s the process:
- Count the Cash: Add up all the bills and coins. If you sold $200, your drawer should have $200 plus the $50 you started with.
- Check the Numbers: A POS prints a sales report—compare it to your cash. Basic registers need you to add receipts by hand. They should line up.
- Sign Out: Finish up and lock the drawer so the money’s safe until the next shift.
Beginner Tip
If the cash is off by a dollar or two, stay calm and note it. A new cashier might close at $150 and miss a dollar, but managers often see it as part of learning. Accuracy improves with each shift.

Step 7: Fix Problems That Come Up
Why Things Go Wrong
Registers can act up—power might fail, or the printer might stop. You can solve these with a little patience.
How to Handle It
Here’s your troubleshooting list:
- Power Goes Out: Batteries keep it going if you’ve got them—keep spares and replace yearly. No batteries? Write sales on paper until it’s back.
- Wrong Sale Amount: If $8 shows as $7, check what you entered. Use the void button to fix it.
- Printer Trouble: Paper jammed? Open it, pull gently, and reload. Nothing printing? Put in a new roll.
- Drawer Sticks: If it won’t open, wiggle the key softly—don’t push too hard.
- Screen Stops: Turn it off for 10 seconds, then on. Still frozen? Call the support number—keep it nearby.
Real-Life Fix
During a busy shift, a printer might jam mid-sale. Clearing it quickly—like in 20 seconds—keeps the line moving and builds confidence. New cashiers can handle these hiccups with practice.
Step 8: Explore Extra Features
Why Go Beyond Basics
Some registers—especially POS systems—do more than just sales. They can save you time and make your job easier.
What You Can Try
Here are some extras to play with:
- Track What’s Selling: Each sale updates your stock—like knowing you’re low on milk. Learn more at restaurant management basics.
- Get to Know Customers: Save their orders to bring them back—see 20 best restaurant marketing ideas and trends.
- Spot Busy Times: See when sales peak to plan better, check out how to plan smarter with a POS.
- Manage Your Team: Track who’s working when with 7shifts.
- Link Multiple Stores: A cloud-based POS system can connect all your locations online.
Tip for Beginners
Start with basic sales, then consider a POS system to unlock these features when ready. For example, using a POS to save customer orders after a few shifts can build repeat visits—results that often catch a manager’s eye.
Tips to Feel Confident as a New Cashier
How to Start Strong
It’s normal to feel shaky at first. These tips will help you settle in:
- Practice a Little: Try fake sales—like a $5 item paid with $10—until it feels easy.
- Learn the Buttons: Find “total” and “void” before customers show up—it saves time.
- Stay Calm: If someone’s upset about a mistake, fix it with a smile—they’ll move on.
- Ask for Help: Don’t guess—ask a coworker if you’re unsure. It’s quicker than struggling.
- Double-Check: Count change twice to avoid slip-ups—small errors can add up.
Settling In Over Time
New cashiers often ring up sales—like $120 in a day—and might slip up, such as giving an extra dollar in change. As a trainer, it’s “no big deal,” and with practice, accuracy improves quickly. Keep at it, and the rhythm comes naturally; every shift gets easier.
Be a Friendly Cashier
Why It Helps
A little friendliness goes a long way—customers remember it and come back.
How to Do It
Try these simple moves:
- Say Hello: A quick “Hi, how’s it going?” starts things off nice.
- Look at Them: Make eye contact—it shows you’re there for them.
- Hand Over Cash Carefully: Don’t drop coins—place them in their hand.
- Say Thanks: A “Thank you, see you soon” feels warm.
- Fix Mistakes Nicely: If you mess up, say, “Oops, I’ll fix that”—keeps it light.
Real Payoff
A cashier I know started saying “thank you” after every sale—tips went up 15% a shift. It’s easy and makes a difference.
Why Learning This Matters
What’s on the Line
If you don’t get the hang of the register, sales slow down, customers get frustrated, and money might not add up right. But when you do it well, your day flies by, people keep coming back, and your boss stays happy. Experts say quick, friendly checkouts build loyalty (check out NTT Data’s Cash Register Guide). One store I know cut checkout time with a good system—sales went up 12%. It’s your chance to shine.
Wrap It Up
Working a cash register is all about keeping things smooth and making customers feel good. With POS USA’s beginner guide, these eight simple steps help new cashiers master sales, fix issues, and even use POS tips fast—one sale at a time. The result? Confidence that shines on the job.
Ready to take it up a notch? For restaurant owners, explore our best POS systems for restaurants to make it even easier. Newbies are set to do great!
Want to find the best POS for you?
FAQs
What’s the difference between a cash register and a POS?
A cash register is a simple machine that handles sales and cash—like adding up a $10 order and taking payment. It’s straightforward, with buttons or a basic screen. A POS, or “point-of-sale” system, does all that plus a lot more. It can track what you’ve got in stock, save customer details, and show you sales trends. Think of a cash register as a calculator and a POS as a mini-computer for your business.
What if my drawer’s off at the end?
Don’t panic—it happens to everyone at some point. First, count all your cash again, nice and slow, to make sure you didn’t miss anything. If you sold $200, your drawer should have $200 plus whatever you started with, like $50. If it’s still off by a few bucks—say $2—write it down in a notebook or on a slip for your boss.
Can I use a tablet as a register?
Yes, a tablet with a mobile POS app works great—light and easy for small setups or busy days. My friend used Square POS at a market and it’s really easy to ring up orders and take payments fast.
What if the register stops mid-sale?
Turn it off for 10 seconds, then on—it often fixes itself. If not, use paper and pen until it’s back. Keep the support number handy. I rebooted mine once mid-rush, and it worked in seconds.
How long does it take to learn a cash register?
Most people get comfortable in about a week of shifts—say, 3-5 days of practice. If you’re brand new, it might take two weeks to feel really smooth. It depends on how busy your place is and how much you practice. Start with some fake sales like entering $5 and pretending to pay $10, until it feels natural.
How do I count change back to a customer?
Counting change is easier than it sounds; just go step by step. Say the total is $6.75, and they give you $10. Start with the sale amount and count up to what they paid: grab a quarter to make $7, then three ones to hit $10. Say it out loud—“7, 8, 9, 10”—and hand it over. It keeps you accurate and shows the customer you’ve got it right. I practiced with coins at home and nailed it on the next shift.
What do I do if I enter the wrong amount?
No stress—it’s a quick fix. If you type $10 instead of $5, look for a “void” or “cancel” button to erase that line—your manager can show you where it is. If the sale’s already done, you might need to do a refund: find the sale (use the receipt if they’ve got it), hit refund, and give back the difference.
Can a cash register track my sales?
Basic ones? Not really—they just handle money. But if you’ve got an electronic register or a POS, yes, it can track sales for you. A POS shows how much you sold—like $300 in a day—and what’s popular, like 50 coffees. It’s a game-changer for small businesses.
How do I train someone else on a cash register?
Start by showing them these steps hands-on. Walk them through a fake sale—say, a $5 item paid with $10—and let them try it. Point out key buttons like “total” and “void,” and watch them do it a few times. Be patient, answer their questions, and let them mess up a little. I trained a coworker once: we did five practice runs, then she rang $50 her first hour with me nearby.